

How To Take Higher Resolution Screenshots Mac
How To
The Complete Guide to Taking Screenshots and Screen Recordings on Mac, iPhone, iPad, and Apple Watch
Posted on July 5th, 2021 by and Kirk McElhearn
Taking screenshots on your MacBook, iMac, iPhone, or iPad is a great way to save things. Rather than save a link to a web page, you can save a picture of it, so you can see it exactly as it was at the time you shot it. You may want to do this when you've bought something online and want to keep a record of the purchase confirmation. You may also take screenshots just to remember items you've been shopping for on your iPhone or iPad, or to send to a friend to show them something you've discovered. You may take a screenshot of some text to post on social media, or take snapshots of friends in a FaceTime call. Or, you may need to take screenshots to demonstrate a problem with your device.
On macOS, iOS, and iPadOS, it's easy to take screenshots, crop them, and annotate them, and they save to the Photos app (or to the Finder on your Mac), so you can access them quickly. You can even take screenshots of your Apple Watch and the Apple TV.
Here's how to take screenshots on all of your Apple devices.
Shoot and save screenshots on your Mac
The Mac has always had easy ways to take screenshots. These were long available using keyboard shortcuts, but a Grab app was present until macOS 10.13 High Sierra. In macOS 14, Mojave, this was replaced with Screenshot, a more powerful and flexible app. You can launch this app by double-clicking it – it's found in /Applications/Utilities – but it's easiest to just use the system-wide keyboard shortcuts that invoke its features. If you're used to using the Print Screen key on Windows, Mac keyboards don't have this key, and instead use a number of keyboard shortcuts.
On the Mac, Command-Shift-3 takes a screenshot of the entire screen. When you press those keys, you'll hear a camera shutter sound and the screenshot will be saved to your Desktop as a PNG file. The document's filename will include the date and time the screenshot was taken.
Video content protected with HDCP (High-bandwidth Digital Content Protection) – such as a movie or TV show in the TV app – will be blacked out, but otherwise your image will show everything that was on your screen when you took the screenshot.
But you can do much more than take a screenshot of your entire display. There are several types of screenshots you can take, each with its own keyboard shortcut, whether you use an iMac, MacBook, or a Mac mini with an external display.
- Command-Shift-3 takes a screenshot of the entire screen.
- Command-Shift-4 takes a screenshot of a region. After you press this shortcut, your cursor turns into crosshairs, and you can click and drag to save just part of your screen. As you drag, if you press the space bar, you can move the region around.
- If you press Command-Shift-4, then press the space bar, you can take a screenshot of a window or menu. Your cursor changes to look like a tiny camera, and as you move your cursor across the screen, you'll see that windows become highlighted in blue. Click to save a screenshot of any window. And if you want to save a screenshot of just a modal window – that's the type of window attached to an app window that appears, for example, when you press Command-S to save a file – press Command-Shift-4, then the space bar, then the Command key again, then press Return.
- Command-Shift-5 displays the screenshot control bar. This tool lets you choose which type of screenshot to take, but also allows you to make a screen recording. From left to right, the icons are for the entire screen, a window, a region, a video recording of the entire screen, or a video recording of a region.
- Command-Shift-6: if you have MacBook Pro with a Touch Bar, you can take a shot of that strip by pressing these keys.

If you click Options, a menu gives you a number of options for your screenshot or screen recording.
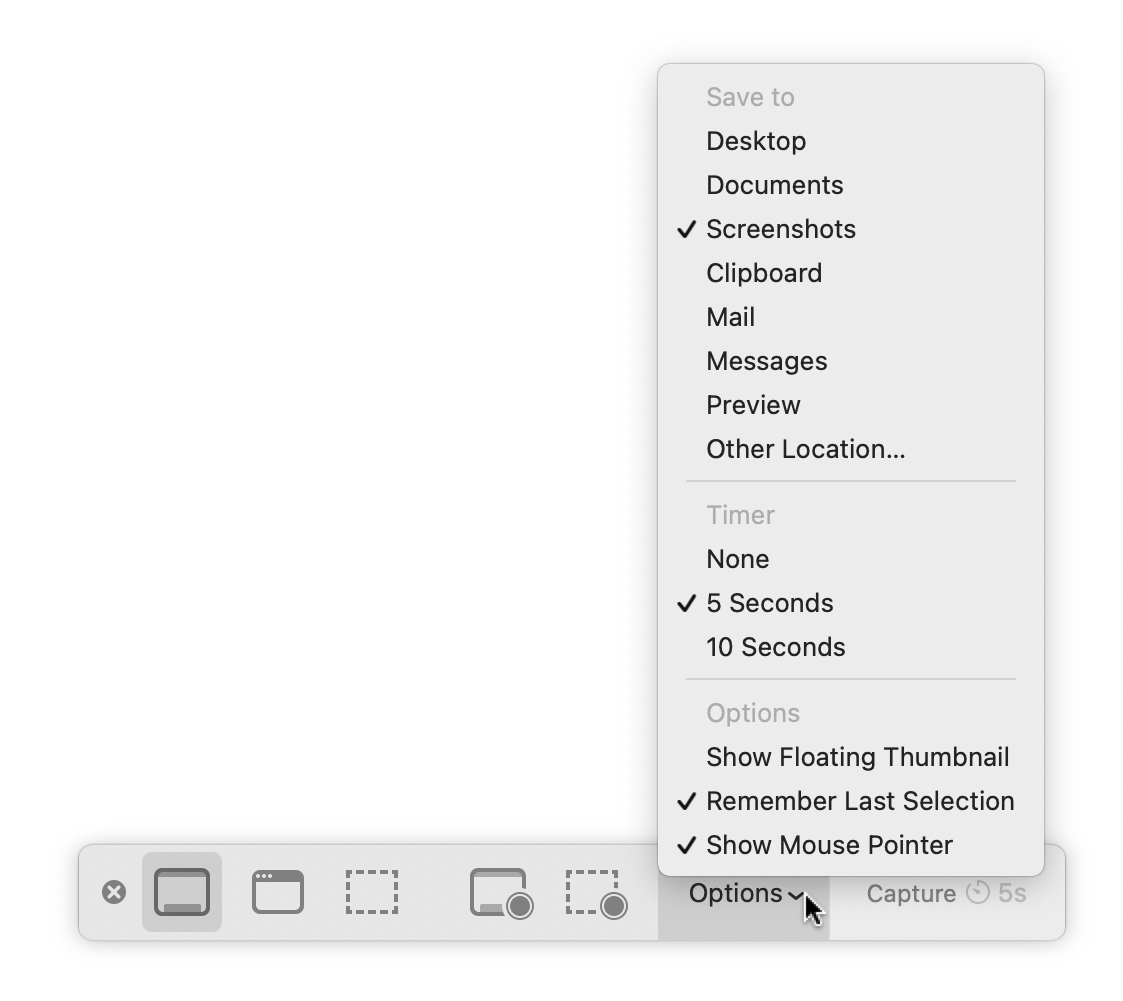
Here's what you can choose in the Options menu:
- Save to: choose a location to save your screenshots. See below for more on where screenshots get saved.
- Timer: if you want a delay before your screenshot, you can choose it here. This is useful for screen recordings more than screenshots. This setting doesn't apply to screenshots you take using the other keyboard shortcuts.
- Options: You can choose here if you want your Mac to display a floating thumbnail for a few seconds at the bottom right of the display, to remember your last selection (window, region, etc.), and whether or not to display your mouse pointer.
Take a screenshots of an entire web page in Safari
None of the above options can shoot a lengthy web page that spans several screens; they only take screenshots of what you can see. If you do want a screenshot of an entire web page, you can use the Awesome Screenshot extension in Safari for that.
Where screenshots get saved on Mac
By default, when you take screenshots on a Mac, they are saved on your Desktop. Some people are fine with saving them there; others find that it makes too much clutter. If you use screenshots often, you might want to create a Screenshots folder somewhere and change the location where screenshots are stored.
To do this, press Command-Shift-5, click Options, and in the Options menu, you'll see a number of locations (as in the screenshot above). If you want to save your screenshots to a custom folder, click Other Location and choose a folder, or click New Folder to create one. In my example above, I save my screenshots to a folder named Screenshots, in my Documents folder. All future screenshots will be saved to that location, not just those that you initiate using this screenshot tool.
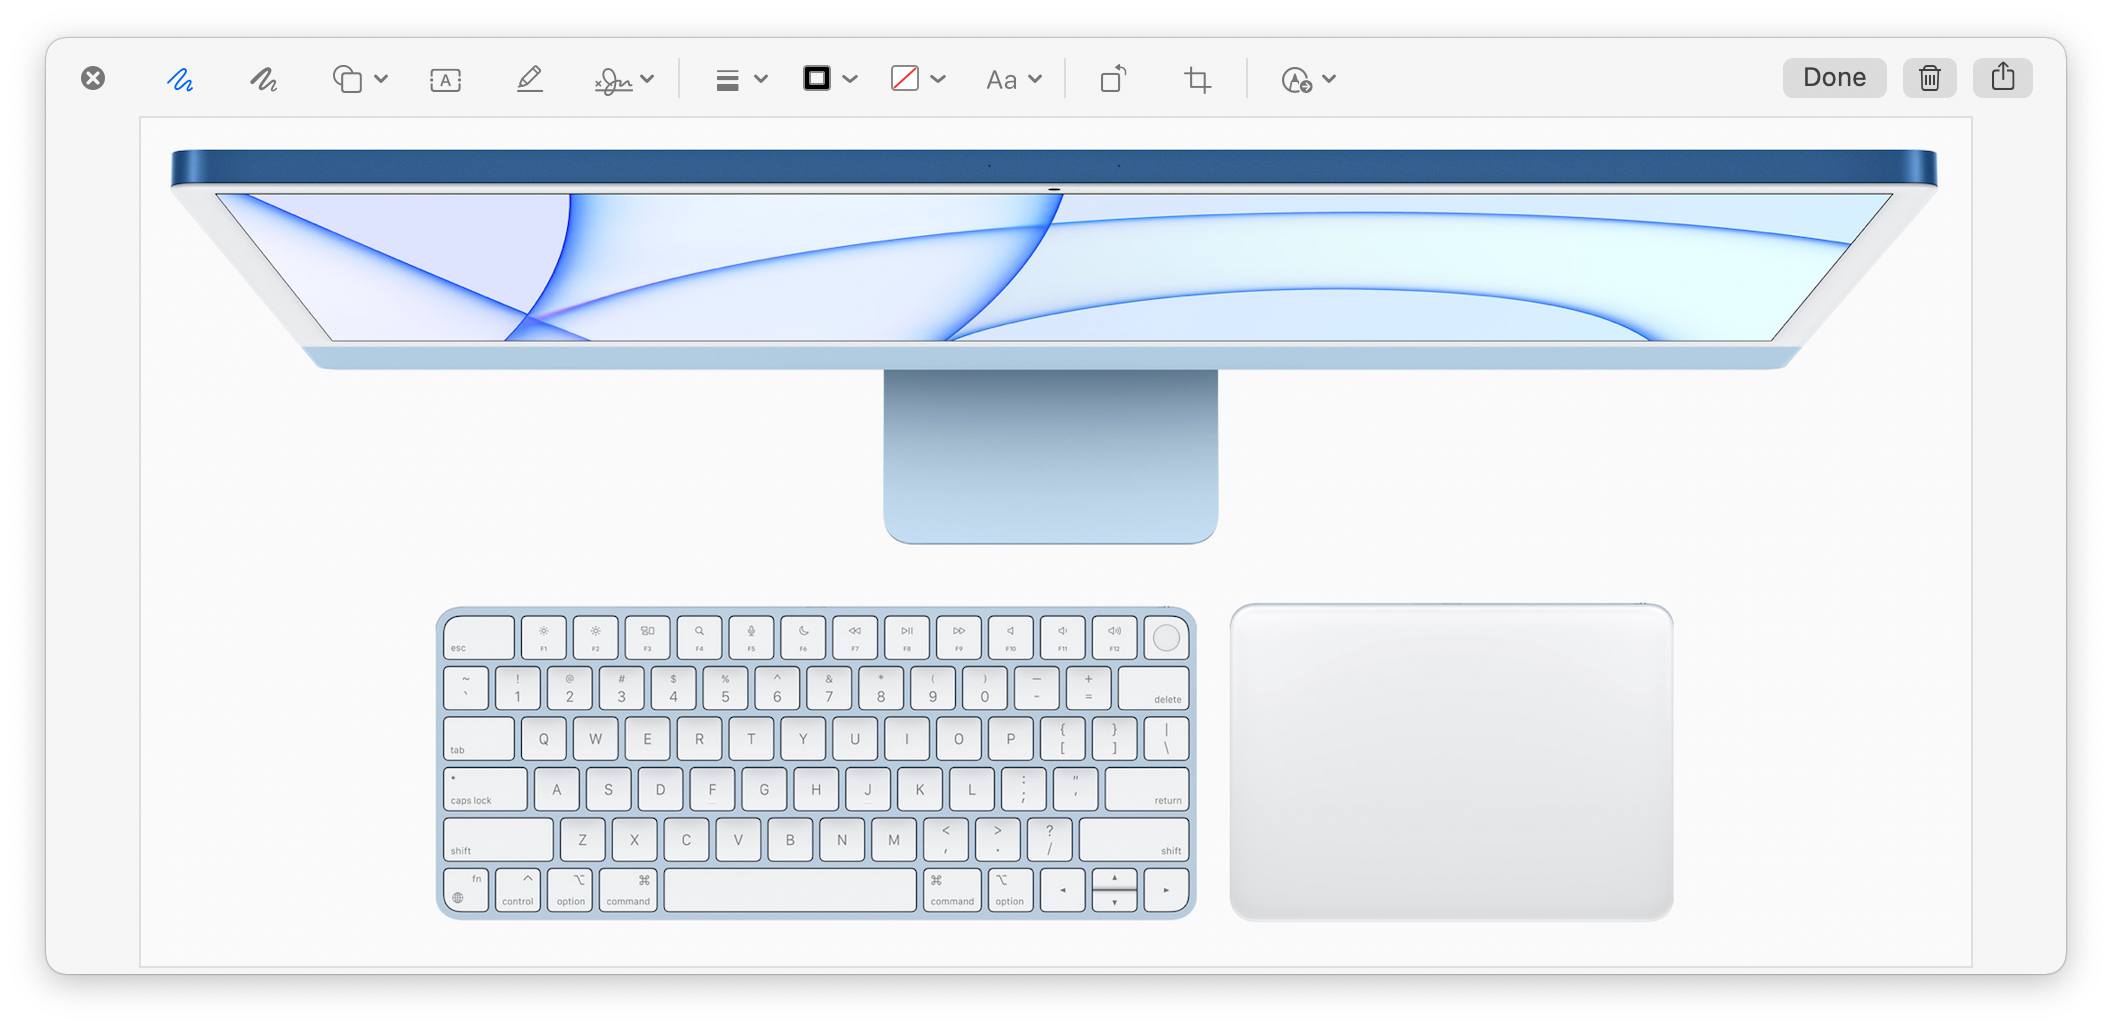
Crop and annotate screenshots
Unless you change the floating thumbnail option mentioned above, your Mac shows your screenshot in a thumbnail in the bottom right corner of your display for a few seconds. If you click that thumbnail, you'll be able to crop and annotate your screenshot. There are lots of tools at the top of this window: see this Apple support document for more details.
Shoot Mac screenshots using Screen Sharing
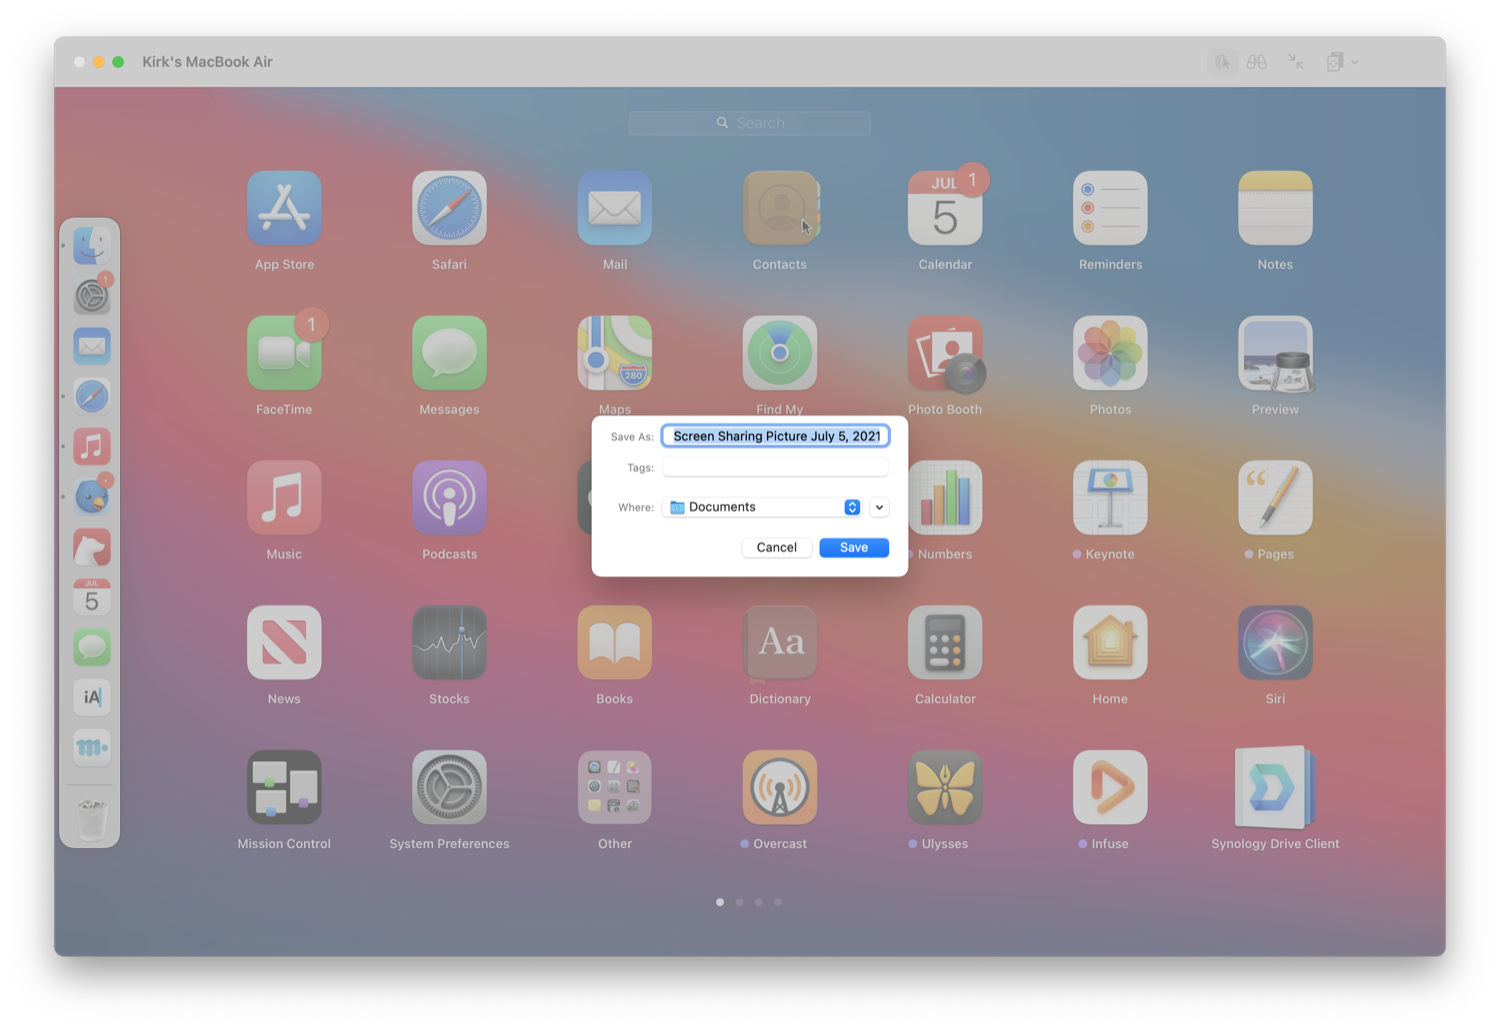
If you've got multiple Macs, you can take screenshots via Screen Sharing, which is handy for being able to focus purely on what you're shooting on one Mac, while doing the actual shooting and saving on another.
You activate Screen Sharing on a Mac by checking the Screen Sharing box in System Preferences > Sharing. In the Finder's sidebar on your other Mac, select the shared computer, click Share Screen, and type in the username and password you use to access that Mac. The Screen Sharing app will launch, and the shared Mac's desktop will appear inside a window.
Screenshots can be saved at any point using Connection > Save Screen Capture As… (to which you can assign a shortcut in the Keyboard pane of System Preferences, if you wish).
If you take screenshots this way, be mindful of two things. First, ramp up quality settings (View > Full Quality), or your screenshots will look like compressed JPEGs. Second, if the shared computer's display is bigger than the one you're sharing it with, turn off scaling in the View menu, or screenshots taken won't be at native resolution – instead, they'll be scaled to the size they're displayed within the Screen Sharing app.
Take screenshots on iOS and iPadOS
You can take a full-screen screenshot on an iPhone, iPad, or iPod touch by pressing a couple of buttons. If you have a device with Face ID, press the side button and power button, or, if there's no power button, press the side button and the volume up button at the same time. If your device has a home button, press the home button and the side button or sleep/wake button simultaneously.
When you do this, you'll see a thumbnail at the bottom left of the screen. If you do nothing, or if you swipe left to remove it, the screenshot gets saved to the Photos app. If you tap the thumbnail, you have access to editing and annotation tools.
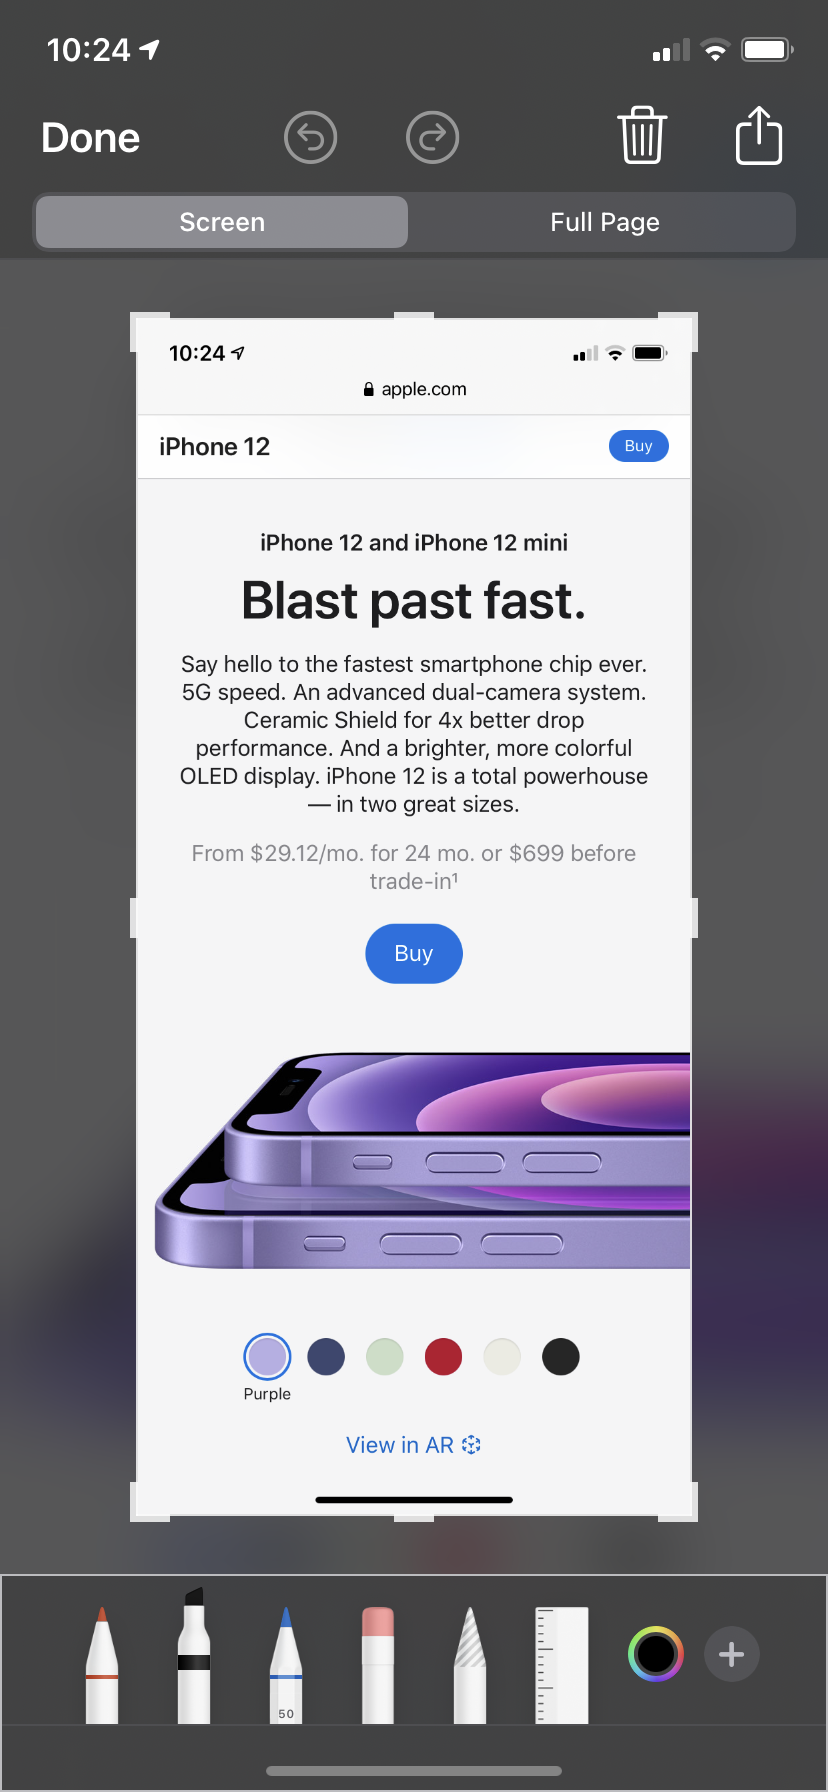
You can crop the screenshot or use Markup to annotate the image: you can draw on it, add shapes, add text, and more. See this Apple support document for more on Markup.
When you're finished, tap Done, and you can choose to save it to Photos or Files. Or, tap the share button and send it by email, Messages, or perform other actions.
You can, of course, annotate the screenshot later, by opening the screenshot from the Photos or Files app, or, if it's synced to the Photos app on your Mac, cropping it in Photos, or drag it to the Finder to edit it with other apps. If you open a screenshot in the Preview app on your Mac, you'll have access to the tools available in Markup, as well as other tools.
Record the screen of your iPhone, iPad, or iPod touch
You can record a video of the screen of your iPhone, iPad, or iPod touch. To do this, you need to enable the Screen Recording icon in Control Center. Go to Settings > Control Center, and tap + next to Screen Recording.
When you've done this, you'll see a screen recording button when you swipe down from the top right of your device's display. Tap this button, and it counts down from 3, then turns red.

You can switch to a different app, and the recording will continue until you stop. To end a screen recording, tap the red button at the top left of your screen, then tap Stop.
Your screen recording is saved to the Photos app, and you can edit it there – trimming the beginning and end, for example – or edit it after it's synced to the Photos app on your Mac.
Take screenshots on an Apple Watch
You may not think of this, but it is possible to take screenshots on an Apple Watch. To be able to do this, you must enable screenshots. Go to the Watch app on your iPhone, then tap General, and scroll down until you see Enable Screenshots; toggle this on.
To take a screenshot on the Apple Watch, press the side button and Digital Crown at the same time. Apple Watch screenshots are saved to the Photos app on your iPhone.
Finding screenshots and screen recordings in the Photos app
If you save your screenshots and screen recordings to the Photos app, you'll find them in Library on all your devices. You can also find them in Albums, where there are special albums labeled Screenshots and Screen Recordings.
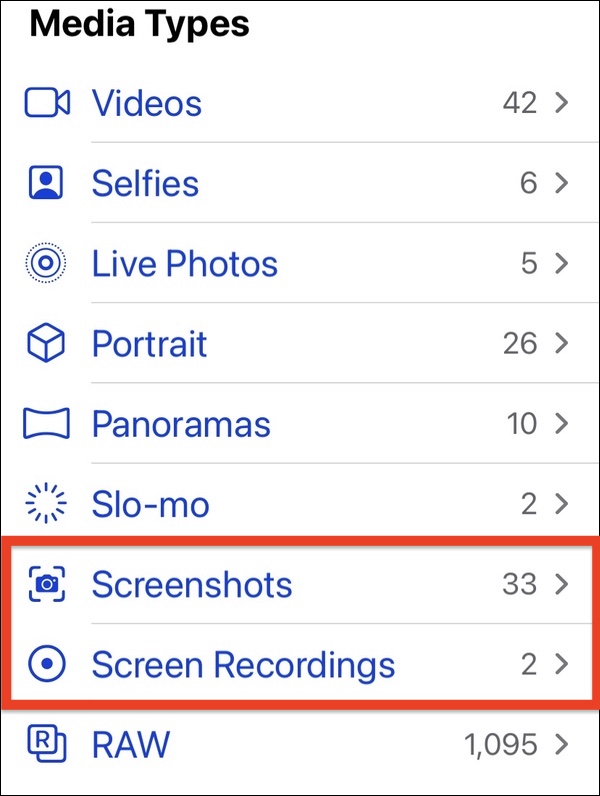
Remember that, on your Mac, screenshots and screen recordings get saved to a folder in the Finder, but if you do want to add them to your Photos library, they will go into the Screenshots or Screen Recordings albums.
Take screenshots on an Apple TV
As with the Apple Watch, you probably won't need screenshots of your Apple TV, but if you do, this is possible. There are two ways to take screenshots on the Apple TV.
The first uses the QuickTime Player app in your Mac's Applications folder. Launch the app, then choose File > New Movie Recording. Click the down-pointing arrow next the red Record button, and choose your device.
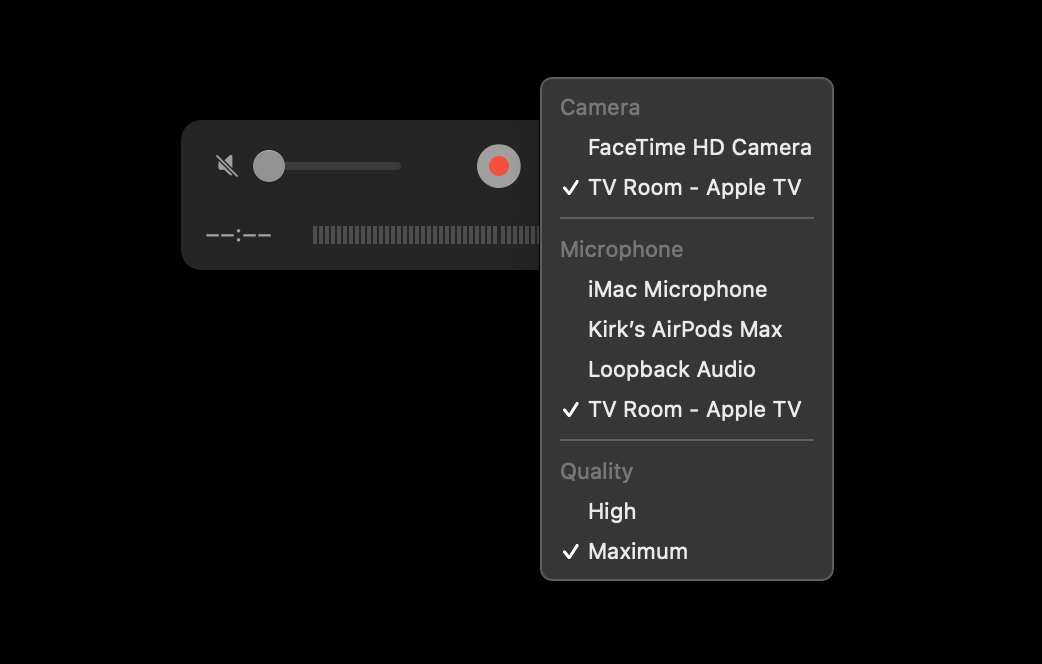
Click the red button to record the device, then, on the Apple TV, navigate to the screen you want to capture. On the Mac, take a screenshot of the QuickTime Player window.
Another alternative is to download and install Xcode, Apple's development environment;Xcode is free on the Mac App Store, but it's quite large: it's a 12 GB download, and it also downloads and installs some additional software when you first run it.
To set up your Apple TV 4K in Xcode, both your Mac and Apple TV need to be on the same wi-fi network. Xcode will find your Apple TV, but you'll need to pair it.
On the Apple TV, go to Settings > Remote Apps & Devices. On Xcode, in the Window menu, choose Devices & Simulators. You should see your Apple TV.
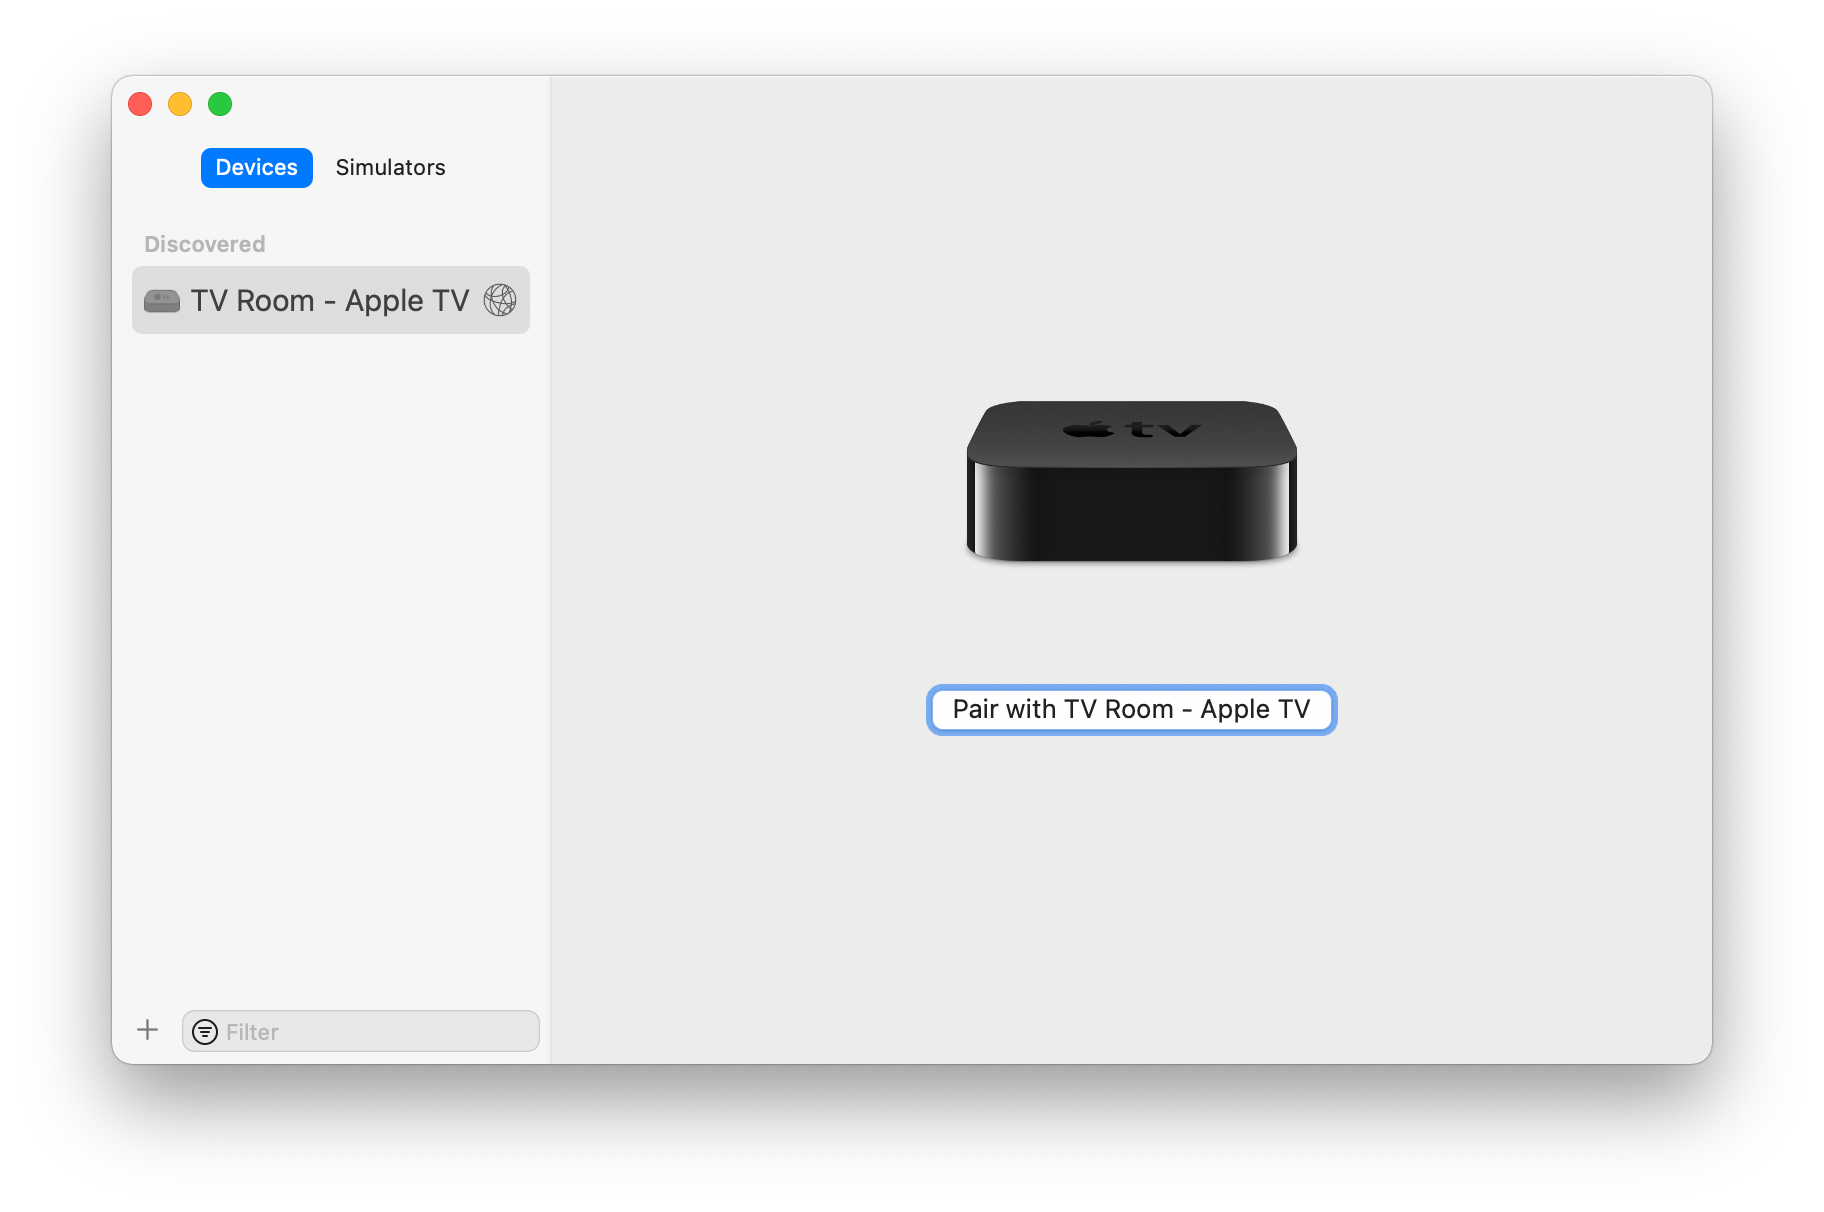
Click the Pair with button; your Apple TV will display a six-digit verification code. Enter that in Xcode. Xcode will then display the Apple TV like this:
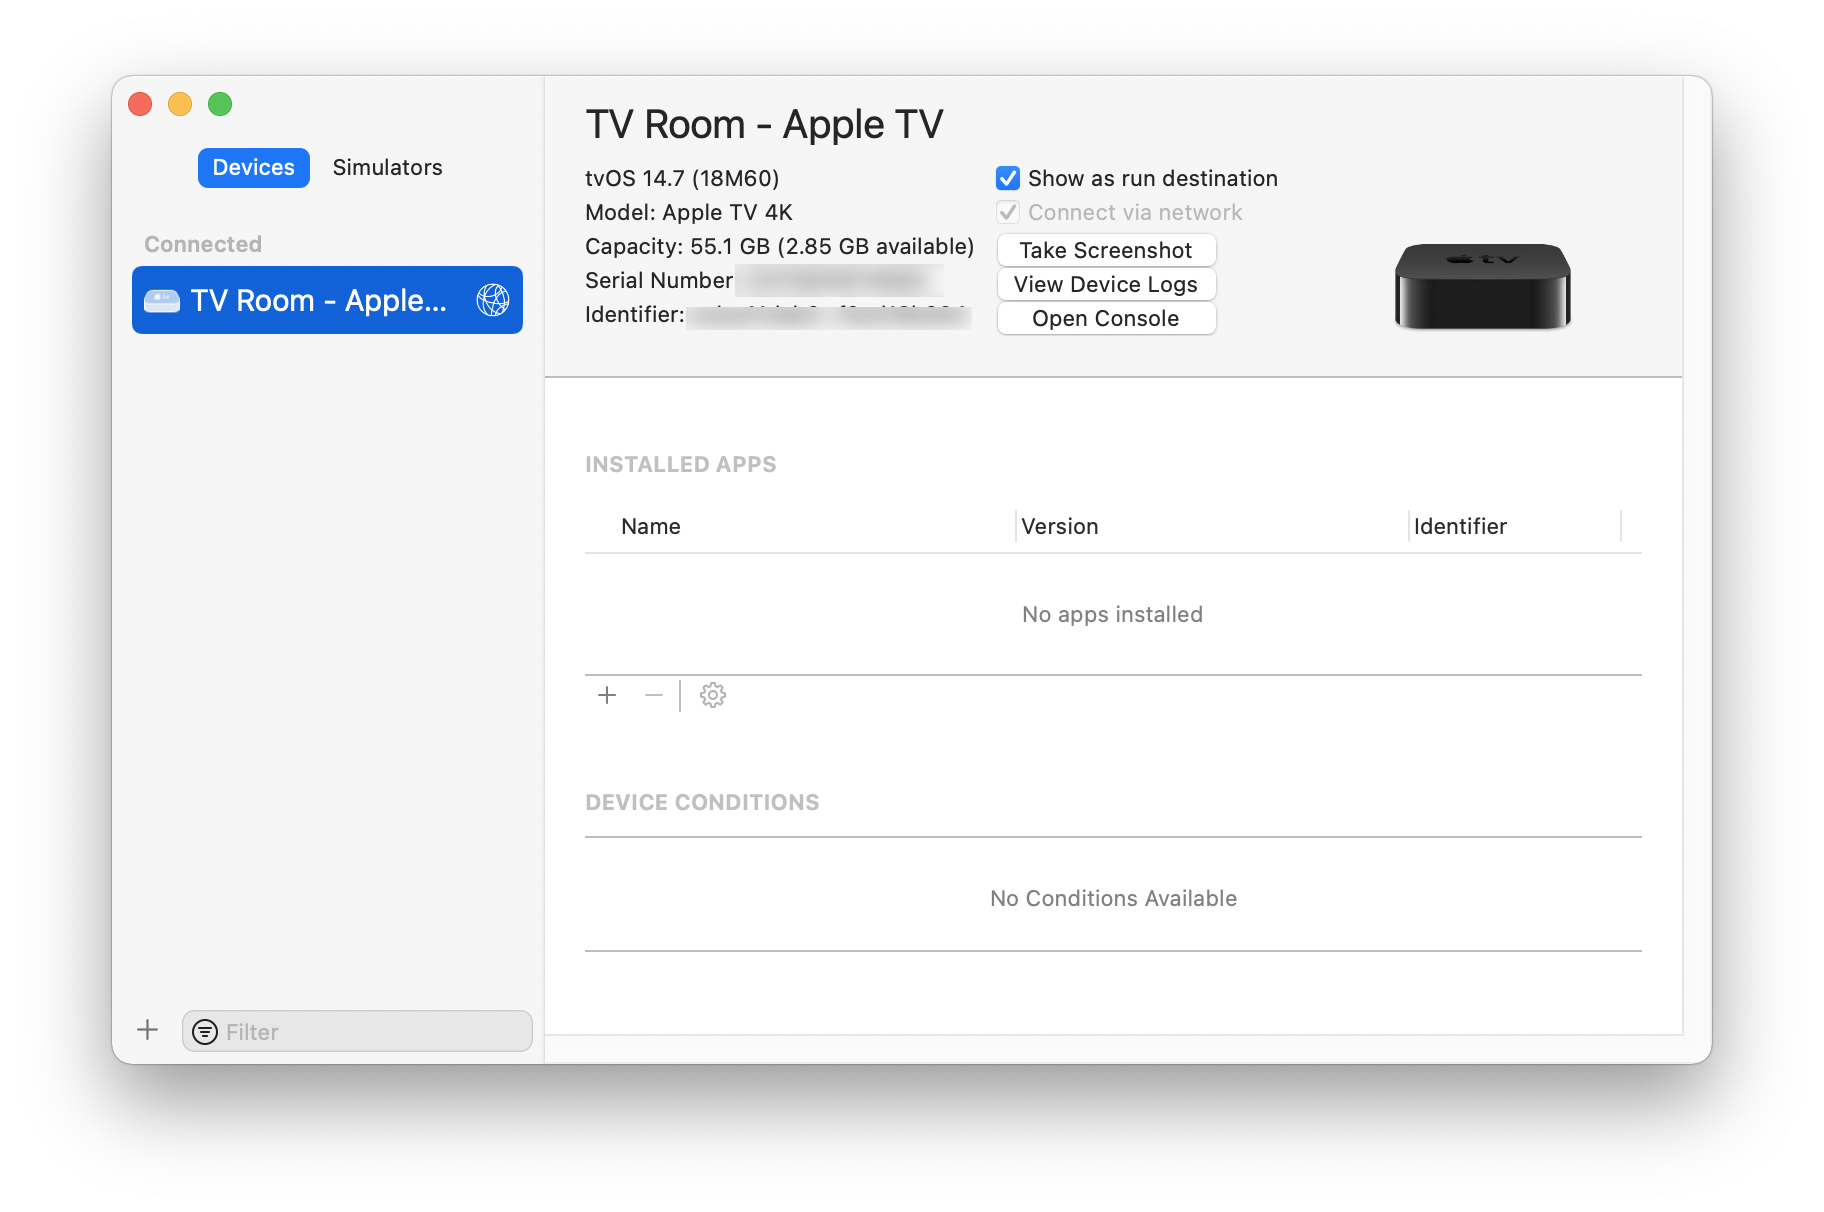
Set up what you want to capture on your Apple TV, then click Take Screenshot. Screenshots from the Apple TV will be saved on the Desktop. Note that, as on the Mac, iPhone, or iPad, protected content will be blacked out.
If you have an older Apple TV model, you can connect the device to your Mac to take screenshots in Xcode. Older Apple TV devices have either a micro USB port or a USB-C port; connect your Apple TV to your Mac, and follow the same instructions as above to take screenshots.
Screenshots can be a useful way to show others what's on your device, or to save reminders of items to check out. They're easy to take, and you only need to remember a few keypresses to take them.
How can I learn more?
 Each week on the Intego Mac Podcast, Intego's Mac security experts discuss the latest Apple news, security and privacy stories, and offer practical advice on getting the most out of your Apple devices. Be sure to follow the podcast to make sure you don't miss any episodes.
We talked about screenshots and more in episode 196 of the Intego Mac Podcast.
You can also subscribe to our e-mail newsletter and keep an eye here on Mac Security Blog for the latest Apple security and privacy news. And don't forget to follow Intego on your favorite social media channels: Facebook, Instagram, Twitter, and YouTube.

About Craig Grannell
Craig Grannell is a technology writer, mostly specialising in Macs, iOS, apps, and games. He's been immersed in all things Apple for over 20 years, and enamoured with computers since getting his hands on a VIC-20 as a kid. He also has a Korg Gadget addiction. Send help. Or alternatively, visit his website, craiggrannell.com, and follow him on Twitter at @craiggrannell. View all posts by Craig Grannell →How To Take Higher Resolution Screenshots Mac
Posted by: besslerouncoung.blogspot.com
Source: https://www.intego.com/mac-security-blog/how-to-shoot-screenshots-on-macos/
0 Response to "How To Take Higher Resolution Screenshots Mac"
Post a Comment